
|
Anns guitar blog:
Dec 27th 2011
With the body closed and my brothers guitar ready for shipment I am ready to get back to the neck
On my last parlor guitar I had a 3/4" tenon and used bolt on brass inserts. To my eye the 3/4 inch
tenon forced me to have a stubbier looking heel than I was looking for. On this guitar
I decided to go with a 1/2" tenon and switching to barrel nuts like Rick showed me when I built
my last Koa parlor. With the switch to barrel nuts I decided to reinforce the tenon with an ebony
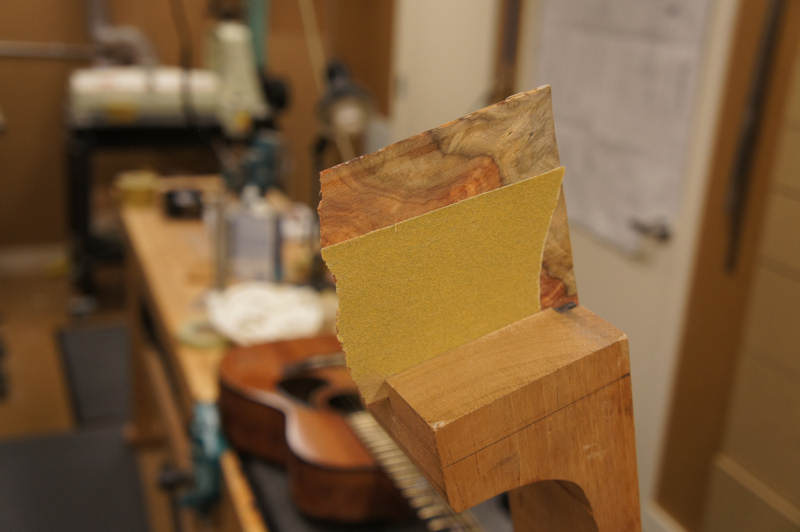
insert running cross-grain to the neck. Basically I am making plywood. In the first series of
pictured you can see I cut the slot in the neck where the tenon will be and I filled it with a
thinned piece of ebony I had from a ruined fingerboard.
 The ebony is 1/8" thick, so I had to take a couple of passes on the bandsaw. If Ken sees the post he might notice I took his advice for the bandsaw upgrade.
 The slot cut clean but I cut it a little small.

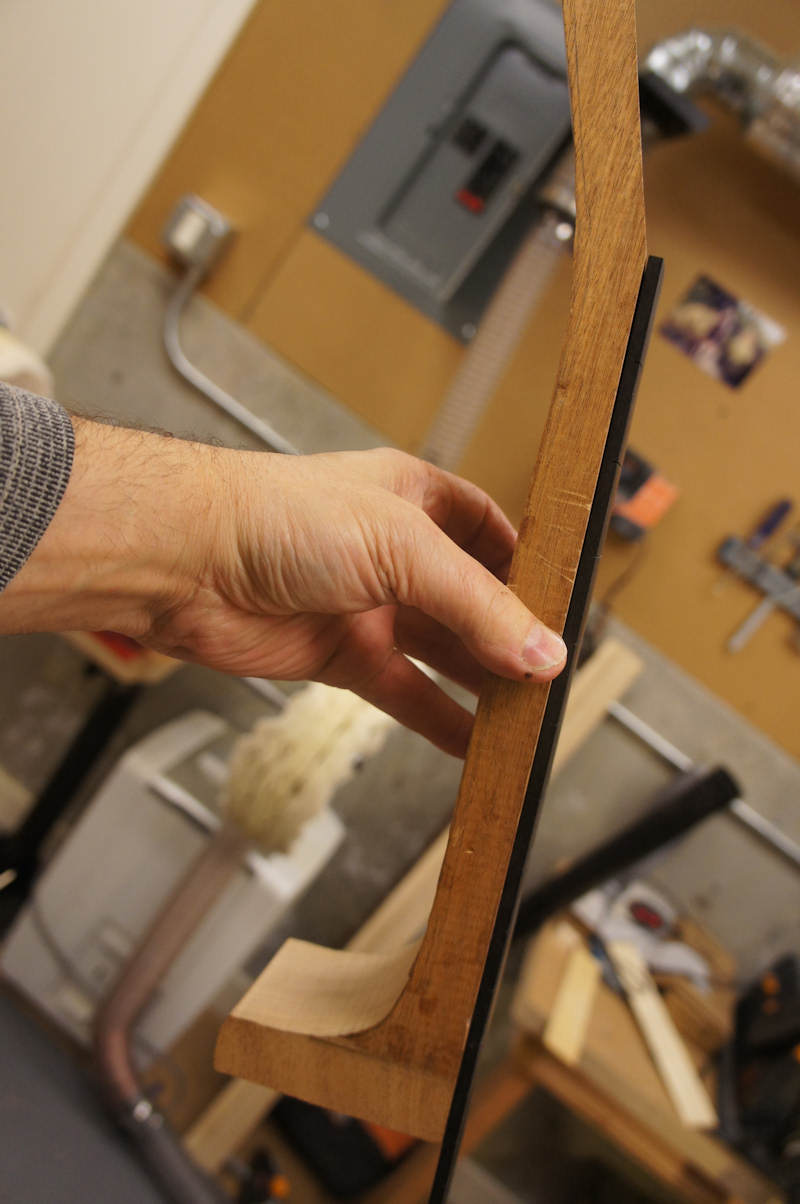
 I used a thin piece of veneer with a slight bow to carefully widen the slot. It was basically the only thing I could fit in.
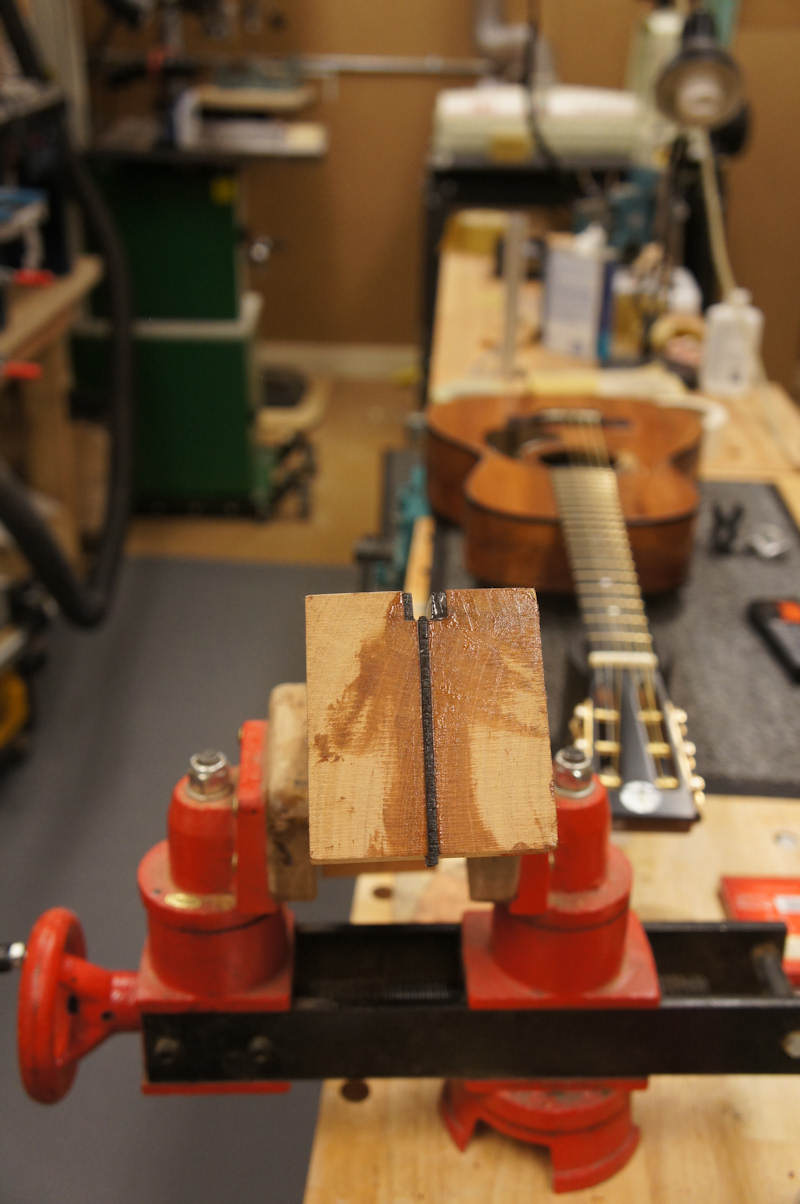
 While the fit looked good I could not see inside so I decided to go with some structural epoxy (that is what it said on the label)
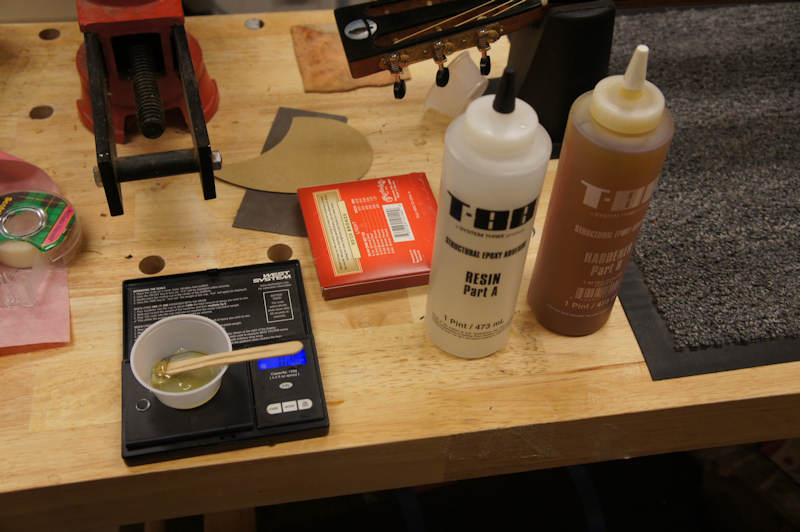 This eboxy take a long time to fully cure so I waited to the neck day to cut the tenon.
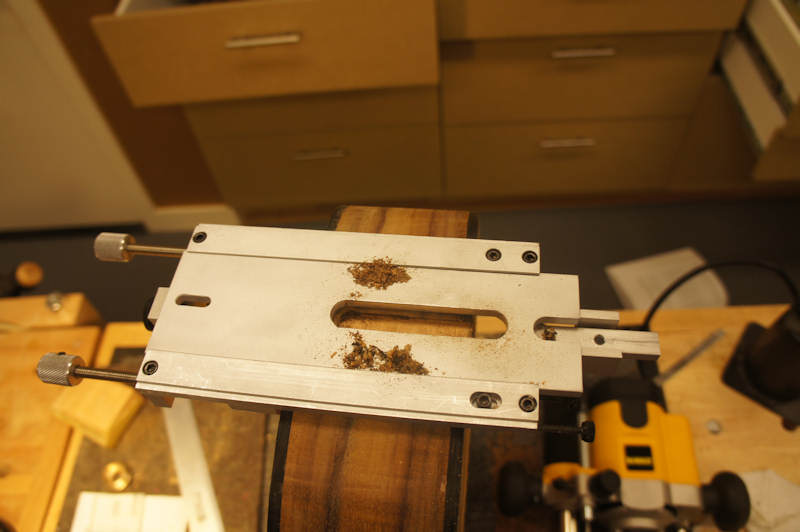
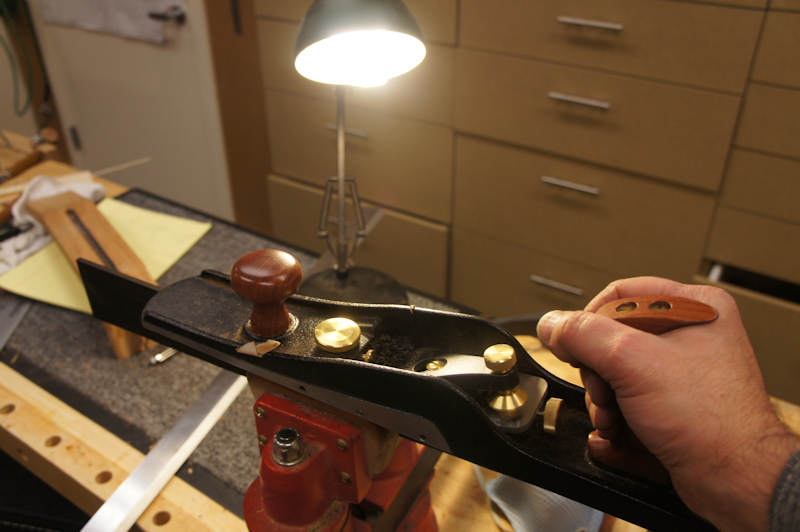
 In the first picture you will see that I am setup to cut the tenon in my fancy neck jig. The jig is really a version of the Woolson neck jig. I have also have used another version of the jig built by Jon Simpson, it is built with plywood. It works the same way as this jig. Basically the neck is clamped on a tilting plane. You can place the body of the guitar on the jig and set the neck angle to match the body. I am not showing that step because I did not set up the tool that way. I just set the angle of the plate the neck is clamped to the correct angle.

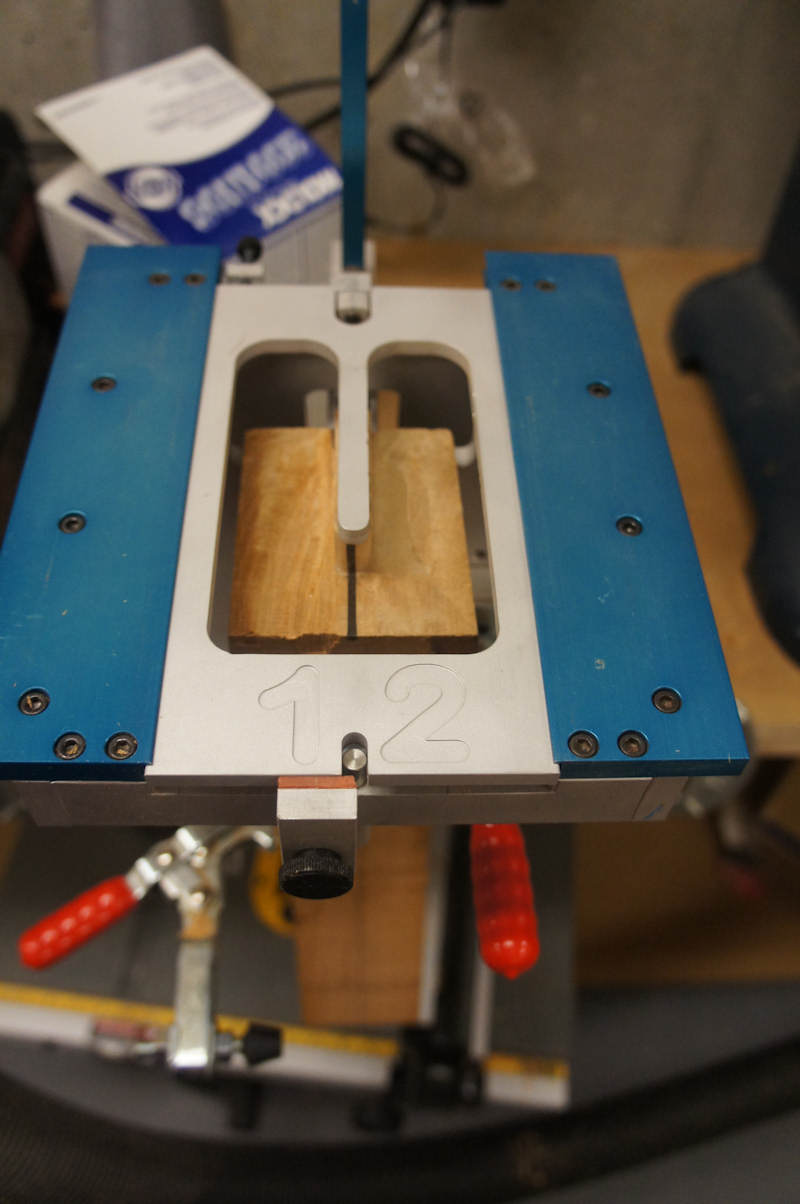 The tool has a clamp for the top of the guitar that has template inserts. The first insert is a template with the center line. Once centered I have a template that just fits a template guide on my router. I used my plung router and cleanly route the mortice.

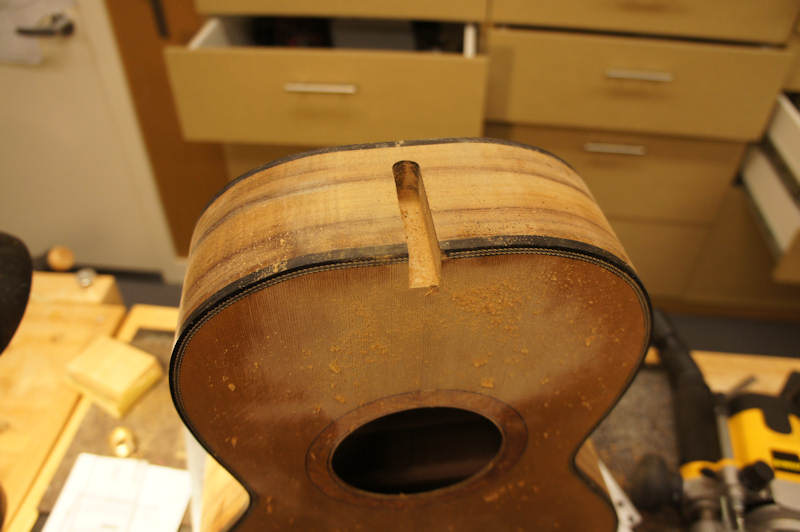
 Checking the neck angle after the route I did end up with the angle I was looking for. I checked without the finger board and double checked with the finger board.

Dec 27th 2011
I am off for another 5 days so there are a lot of posts. I am basically a type-A personality,
plus my wife has all three of her sisters at our house and the shop is a bit of a refuge.
I like the woolson style jig; this is my third neck using one and each time I used it the angle
came out really close. The wood tenon cutting jig works as well as the fancy one, in one respect
the wood one is a little better. When template is slid in place on the Luthier tools version,
there is a slight recess and I need to be very careful with the router over to one side that
the unsupported slid does not dip into the recess. The Simpson jig I had has a complete and
seperate templates for mortise and tenon or dovetail. I do really like the body clamp on the
Luthier tool version with the centering template and the ability to change out templates.
Today I completed my finger board indexing system. It was a lot easier than I thought once I
remembered I had a neck template from Waldron Instruments that had a nice center line and a nut
line. Also their templates are thin enough that I did not need a center line on each side.
Two quick 1/8 inch holes and I had a template. The template has text on it so I decided on a
system where I always have the template so the text will read from the front of the neck.
As the photos will show that did not stop me from indexing from the bottom of the fingerboard.


Dec 27th 2011
I have not been brave enough to do contrasting fingerboard bindings (mainly because I do not want
to bind the head stock veneer.) But I do like the bound fingerboards, so I laid out the
fingerboard size to include the .080 ebony binding on each side. I first laid out the proper
lines for the final fingerboard size and then measuring from the center line laid out the adjusted
lines. This sort of gave me a double check as I ended up with a two parallel lines about .080”
apart. I cut on the outside lines and used my jointer plane to take the fingerboard down to the
final dimensions. I did not take a picture of the glue up, but I laid out some wax paper on my
bench and used hand pressure pushing the fingerboard flat side down against the binding supported
by some brace wood supported by a couple of bench dogs. While under pressure I dotted the joint
with CA. With both bindings tacked on I flooded the joint with CA glue. Not too much as I hate
cleaning out the fret slots.


Dec 29th 2011
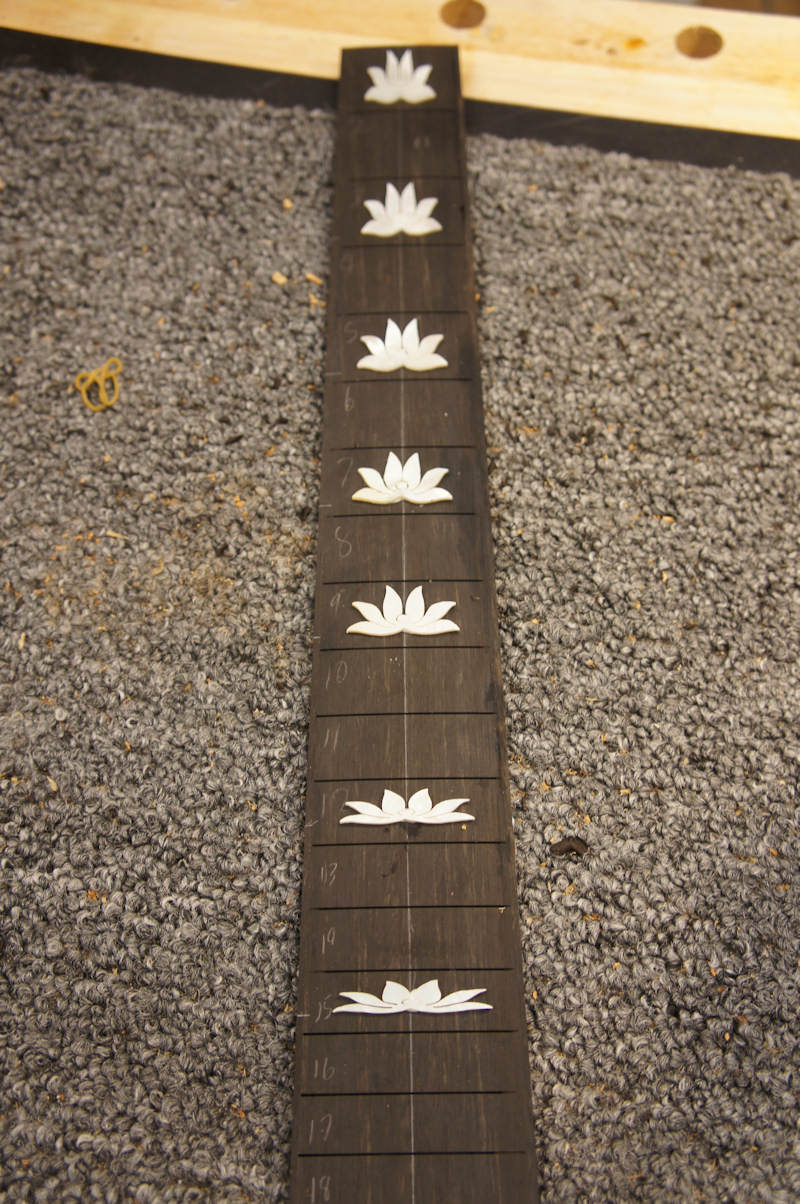
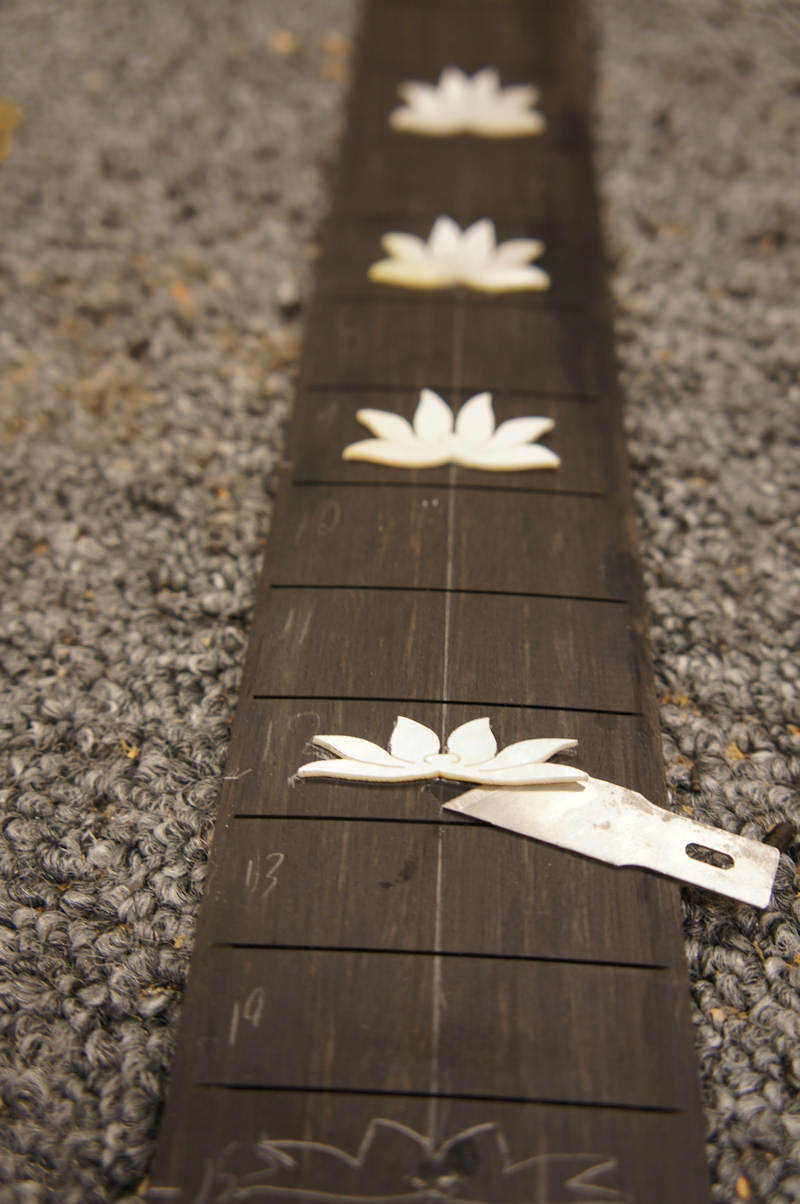
I was only able to spend a little time this morning on the guitar,
but I did get the fingerboard inlays installed. It went pretty well; on some of them
I would be ready for inlays on lighter wood. But luckily enough for me I am doing it in ebony.
To keep documenting how I do things, First I use LMI white glue just a dab to hold the inlays
down to trace the pattern with a .05 mm lead pencil. I only let it set up for ten minutes before
I trace. Then I carefully pop them off with an exacto knife blade.
When I routed for the inlays I tried two different procedures. One some of the holes first
I traced out the pattern with a very small end mill, and then went after the bulk of the material
a larger mill. On the rest of the holes I took out most of the material with a larger end mill
and cleaned up the details with the very small mill. I still am not sure which I like best.
I am leaning on bulk removal first followed by detail.
Here are the pictures.


 For tomorrow I am still trying to figure out which veneer to use from the two I cut. Then it is one to profiling the headstock and possibly carving the neck.


Next Page
|
|

|
|
|